

Webcam Bridge
Overview
Webcam Bridge allows users in a Remote Desktop (RDP) session to:
- Use their local webcams in the remote session
- Use their local microphones in the remote session
- Hear remote-session audio through their local computer speakers/headphones
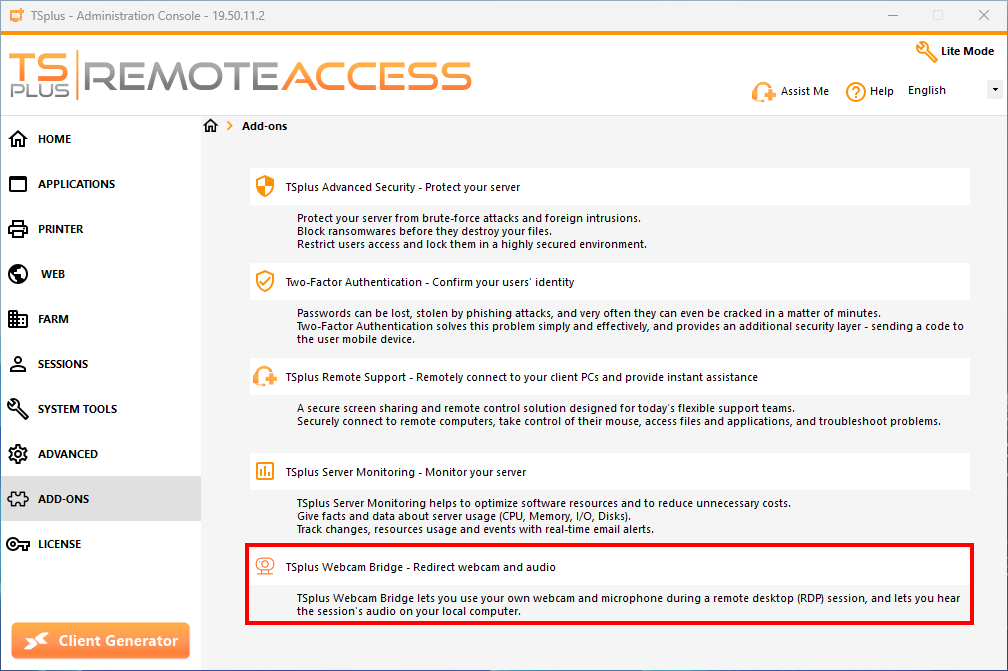
Webcam Bridge is introduced as an add-on of Remote Access, and its administration console is available in the AdminTool > Addons section.
Requirements
On the server side:
- A valid TSplus Remote Access Enterprise license
- Webcam Bridge Server installed
On the workstation side:
- Webcam Bridge Client installed on the workstation
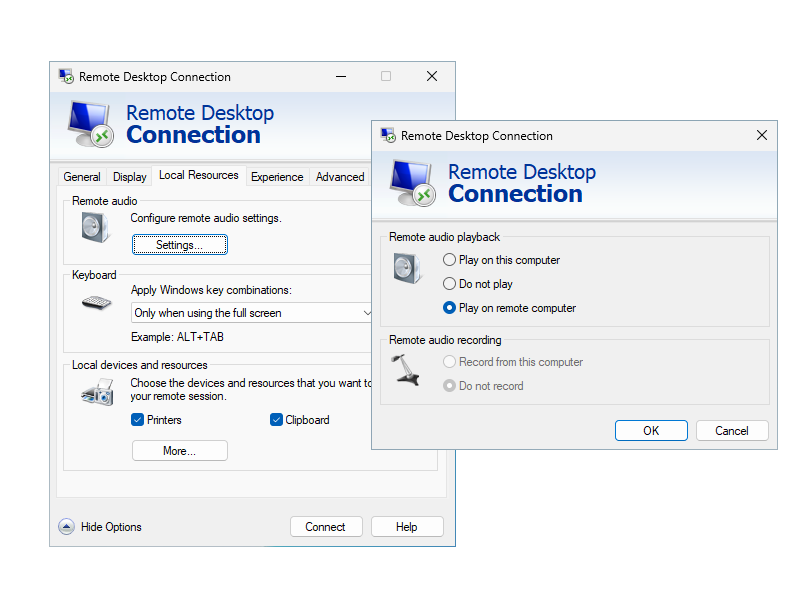
- For audio redirection only, the RDP option “Remote audio playback” will need to be set to “Play on remote computer”
This option can be found in mstsc options, in “Local Resources” > “Remote Audio” > “Settings”.
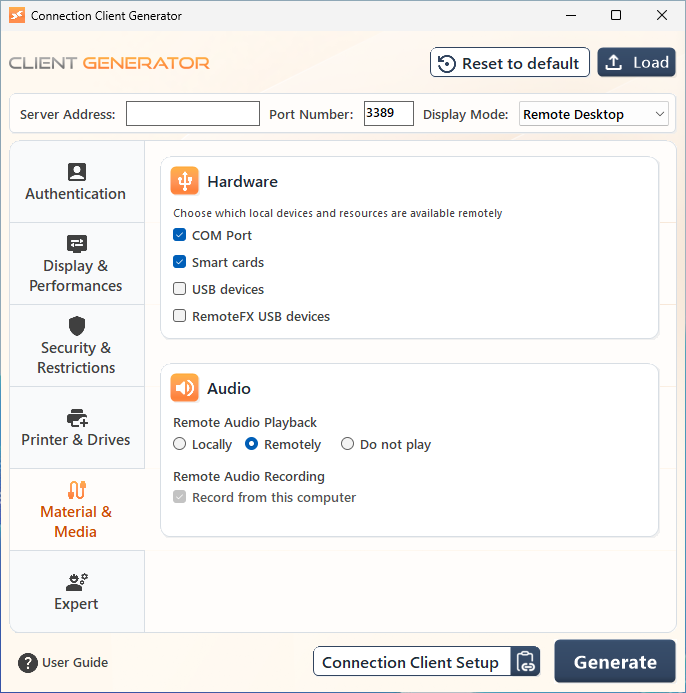
If you use a .connect file, the same option can be found in the Client Generator, in “Material & Media” > “Audio” > “Remote Audio Playback” > “Remotely”.
Settings for applications using the virtual webcam and microphone
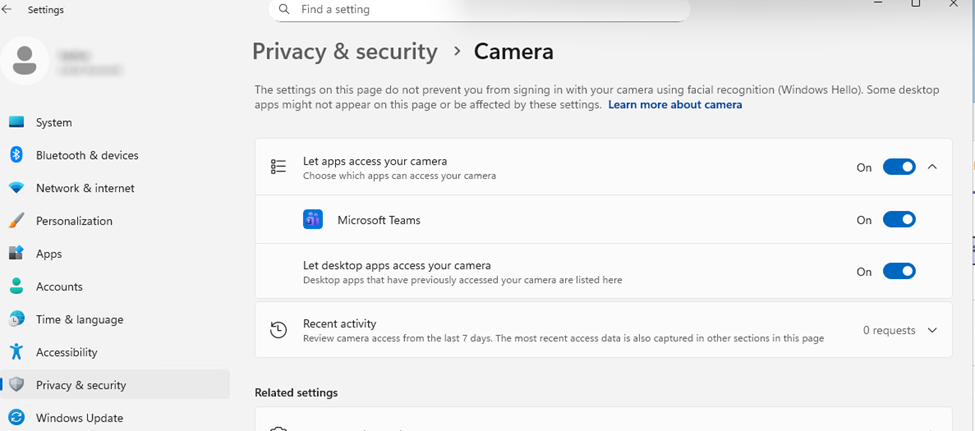
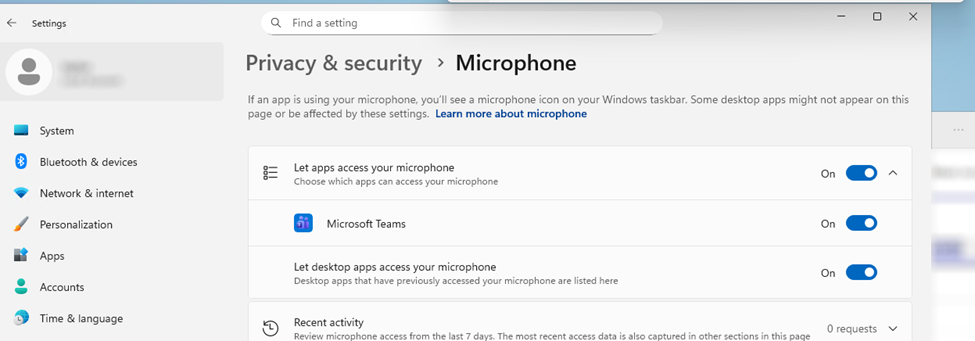
In order to make the virtual webcam and microphone accessible by applications, you may need to allow them first.
To do so, once connected to your Remote Access server via RDP, go to your Windows settings “Privacy & Security”, and then allow your application to access your camera and your microphone.
Where to find the Webcam Bridge Client setup
The Webcam Bridge Client setup “Setup-WebcamBridge-Client.exe” can be found directly in “C:\Program Files (x86)\TSplus-WebcamBridge-Server\client”.
The Connection Client setup of TSplus Remote Access also embed the Webcam Bridge client setup, so installing the connection client will also install the Webcam Bridge client.
If the Webcam Bridge server part is installed on a TSplus Remote Access server, you can also rely on the “Setup-ConnectionClient.exe” in “C:\Program Files (x86)\TSplus\Clients\WindowsClient”.
Getting Started
Supposing the prerequisites are all met, when you connect to your server via RDP, you will now be able to use the following virtual devices on your remote session:
- the “Virtual Webcam” webcam
- the “Virtual Audio Speaker” speaker
- the “Virtual Audio Microphone” microphone
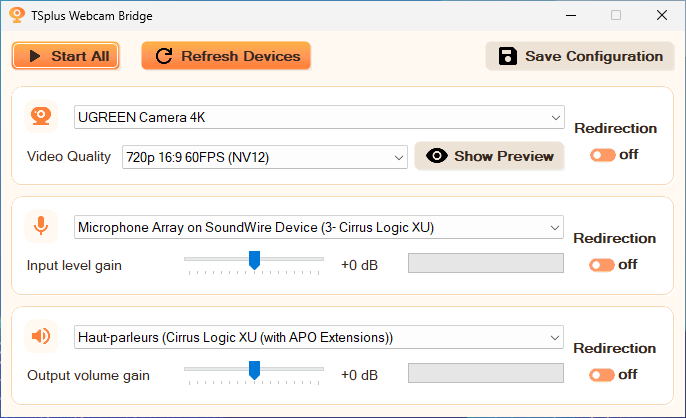
To manage which local webcam/audio devices to use and redirect to these virtual devices, use the WebcamBridge.exe file.
To start the redirection of your local devices, select first the webcam as well as the image format you want to use, then press the Redirection toggle button.
If you need to redirect a local device (webcam/microphone/speaker/headphones) which hasn’t been plugged yet, simply plug it and hit the “Refresh Devices” button to update the list of available local devices.
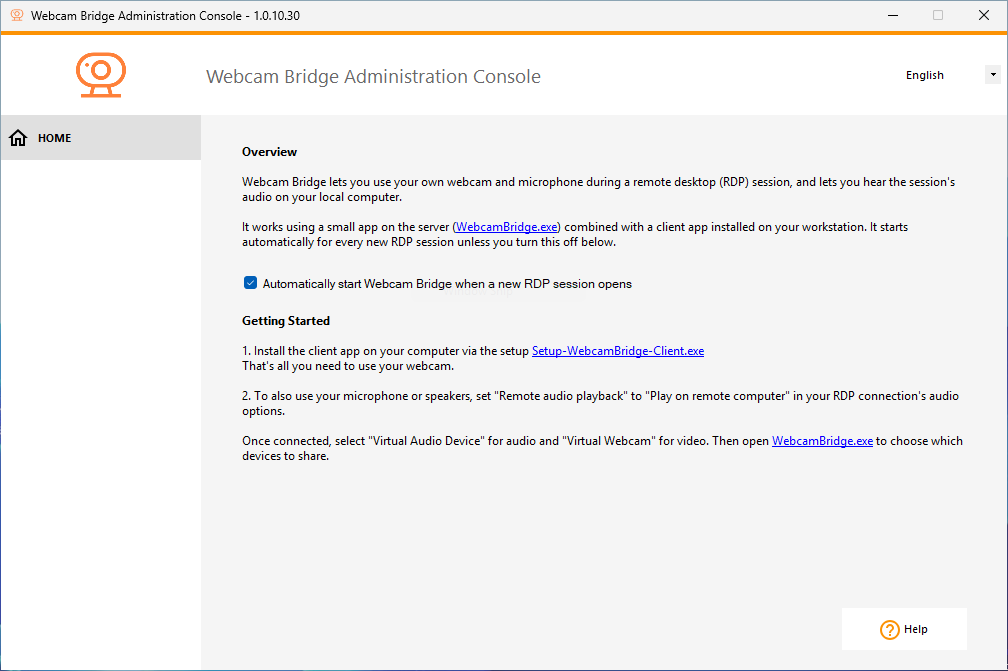
Note: you can configure the WebcamBridge.exe to automatically start when a new RDP session opens. To do so, access the Webcam Bridge Administration Console via the AdminTool > Addons section, or directly via the WebcamBridgeAdmin.exe file, and tick the associated checkbox.
Limitations
-
In multi-user setups, full audio redirection is supported only when the WebcamBridge server component runs on Windows Server.
On Windows Pro, audio input/output can be redirected by only one RDP session at a time: the most recently opened session takes over.
Earlier sessions lose microphone and speaker redirection. -
Webcam Bridge does not work over HTML5 session
Troubleshooting and Logging
If the Webcam Bridge add-on is not working properly, first make sure that all prerequisites listed above are met.
Once prerequisites are confirmed, collect logs from both components, as Webcam Bridge is split into a workstation side and a server side:
-
On the workstation side, retrieve:
- All the log files in “%USERPROFILE%\Webcam Bridge Client\logs”
-
On the server side, retrieve:
- All the “Service” log files in “C:\Program Files (x86)\TSplus-WebcamBridge-Server\logs”
- All the “User” log files in “C:\Program Files (x86)\TSplus-WebcamBridge-Server\logs\users\username_you_connected_with_to_reproduce_the_problem”