Server Management
On the Home tab of the AdminTool, you can see all the needed information about your TSplus server:

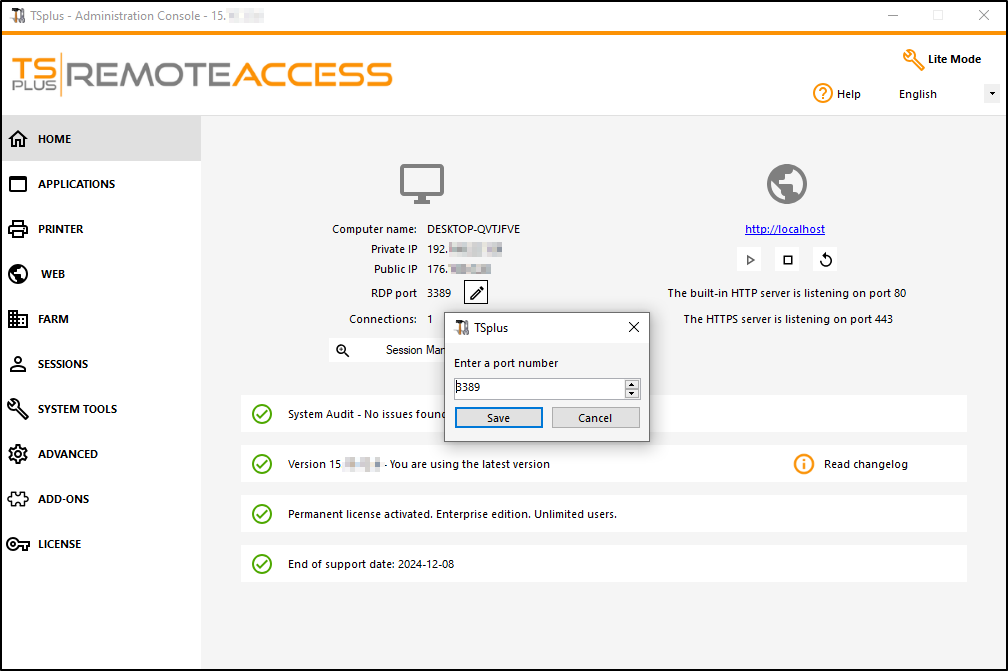
Changing the RDP port number and setting up the firewall
With the AdminTool, you can select a different TCP/IP port number for the RDP service to accept connections on. The default one is 3389. You can choose any arbitrary port, assuming that it is not already used on your network and that you set the same port number on your firewalls and on each TSplus user access programs.
TSplus includes a unique port forwarding and tunneling capability: regardless the RDP port that has been set, the RDP will also be available on the HTTP and on the HTTPS port number!
If users want to access your TSplus server outside from your network, you must ensure all incoming connections on the port chosen are forwarded to the TSplus server.
Management of users and sessions
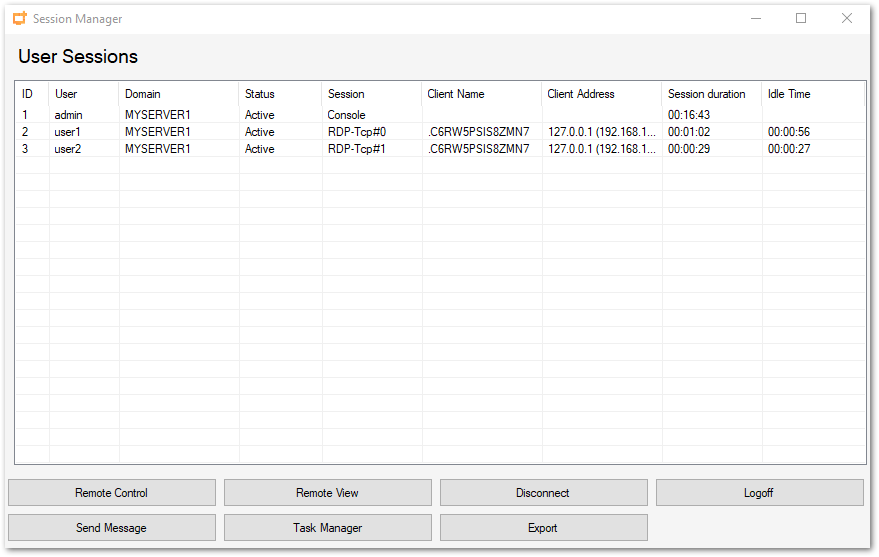
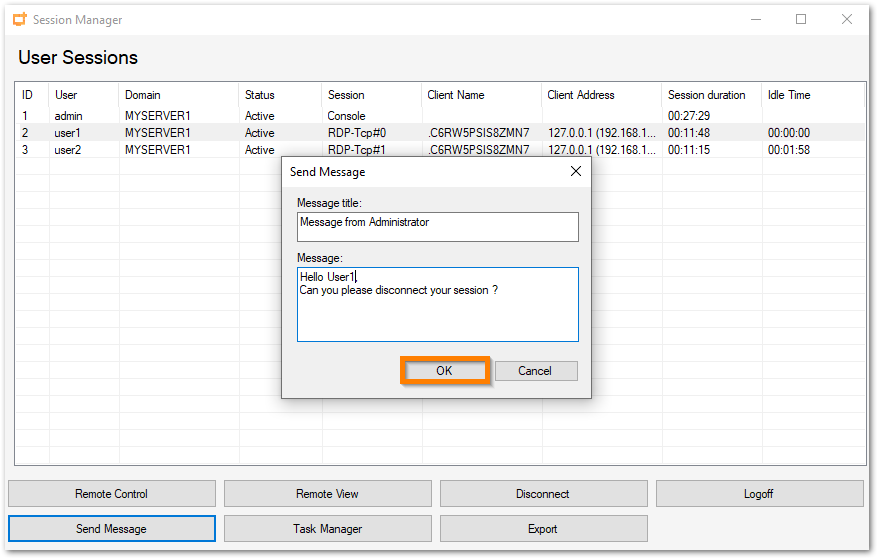
The session manager is located right below the RDP port:
![]()
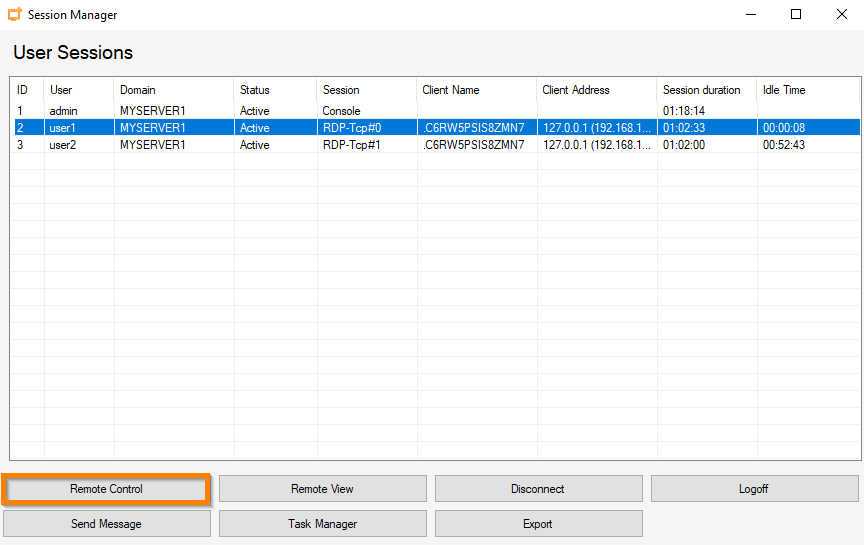
You can display your server’s task manager, and you have the possibilities to active a remote control, disconnect, logoff or send a message to your users.
You can activate the remote control via a remote session with an admin account on the following Operating Systems:
- Windows Server 2008 R2
- Windows Server 2012 R2
- Windows Server 2016
- Windows Server 2019
- Windows 7
- Windows 8.1
- Windows 10 pro and above
On Windows XP, 2003, Vista, and 2008 there is no remote control button.
On Windows 2012 and 8 a message appears advising you to update to 2012 R2 or 8.1.
When you activate the remote control for a user’s session, this message appears, indicating the keyboard shortcut to end the session:
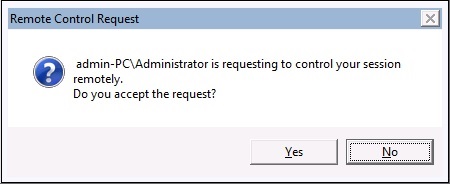
On the client side, this message appears to accept the remote control:
You can also send a message to your user:
 Message sent on Server Side
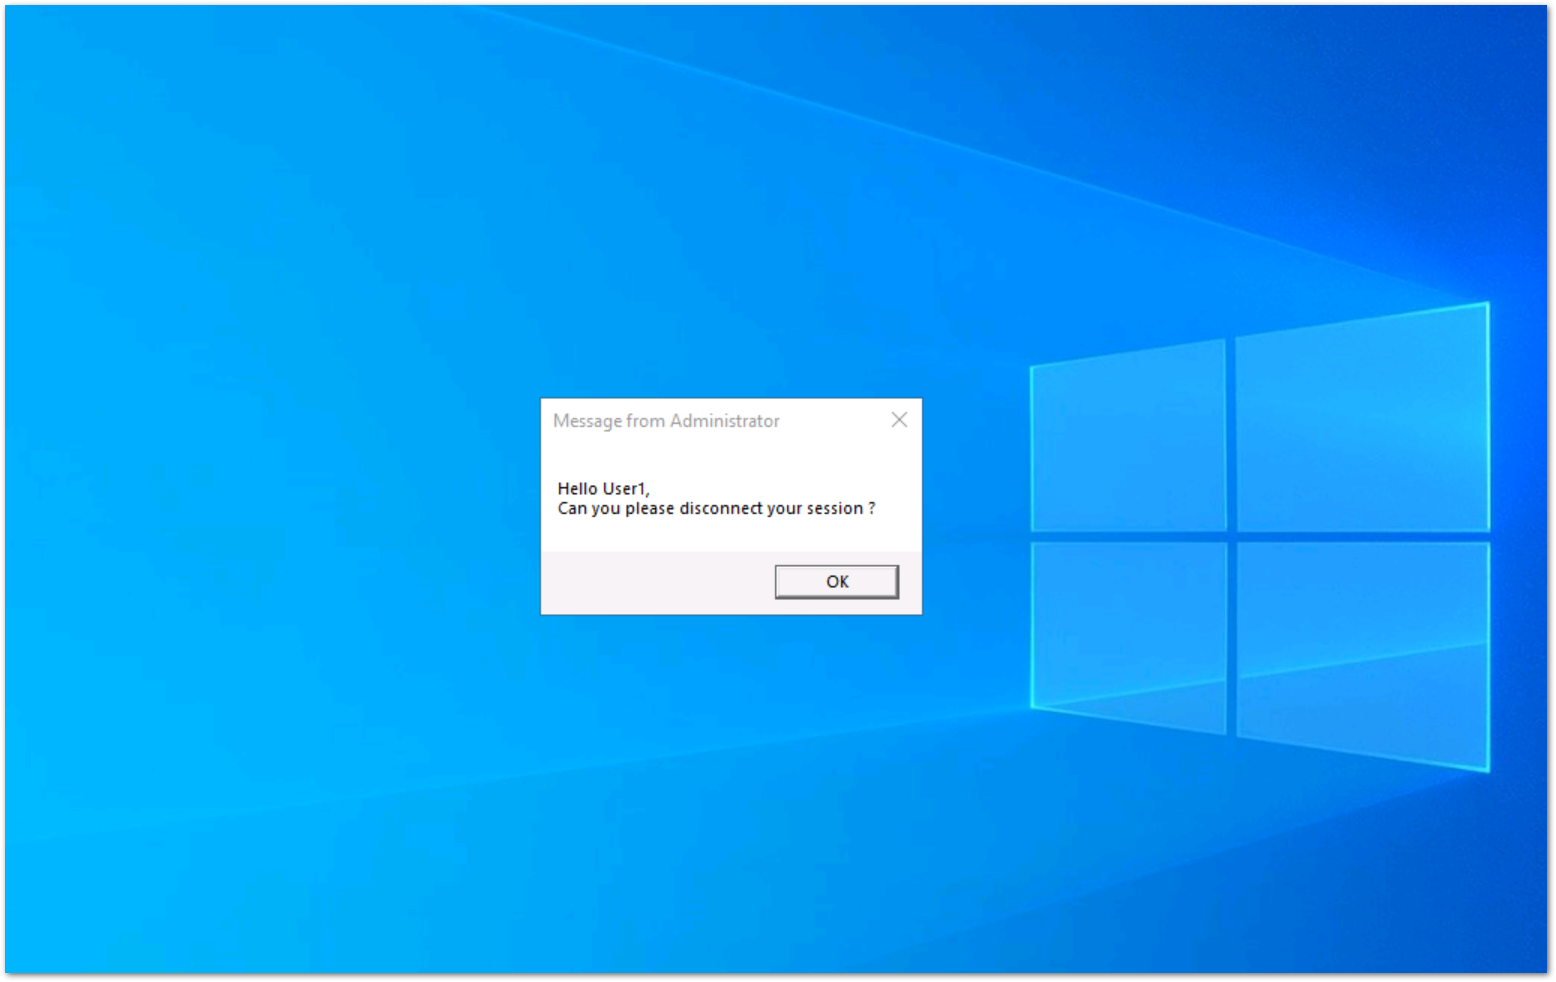 Message appearing on Client Side
![]()
See this documentation for more information.
- With the Session Management Settings (GPO) tab, you can set various connection settings for each session and user:
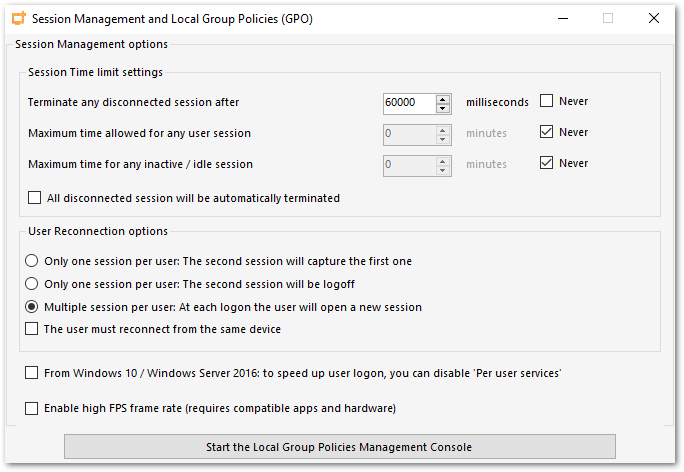
Windows Server 2016 introduced a new “Per user service”, which makes services start all processes per users, which slows the users logons time.
Since TSplus 11.70 release, you can disable per user services in order to speed up users logons.
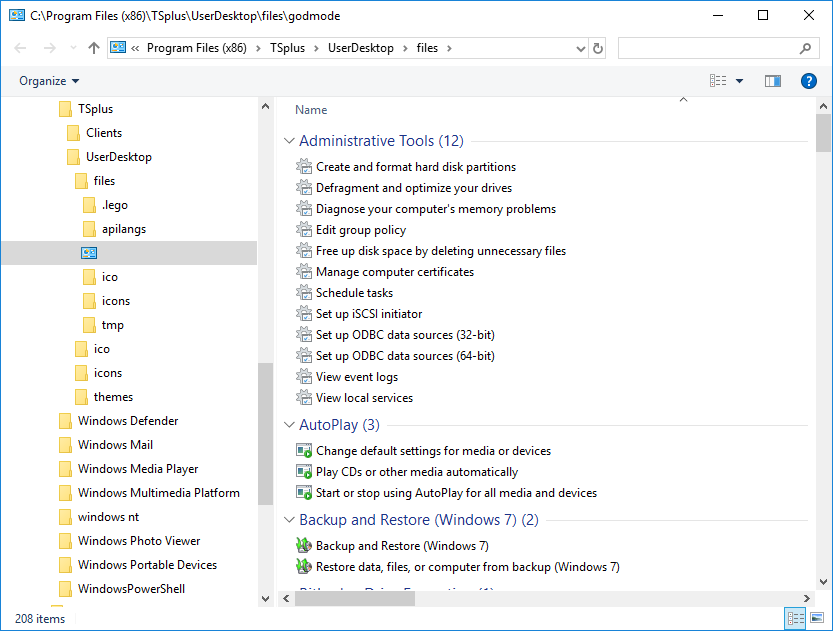
- The Windows Toolkit is an enhanced control panel, summarizing all the Windows Administration tools.
![]()
- You can also launch the “Server Properties” tab to have an overview of the control panel.
![]()
- You can see all the services on your server and their status on the Services tile.
![]()
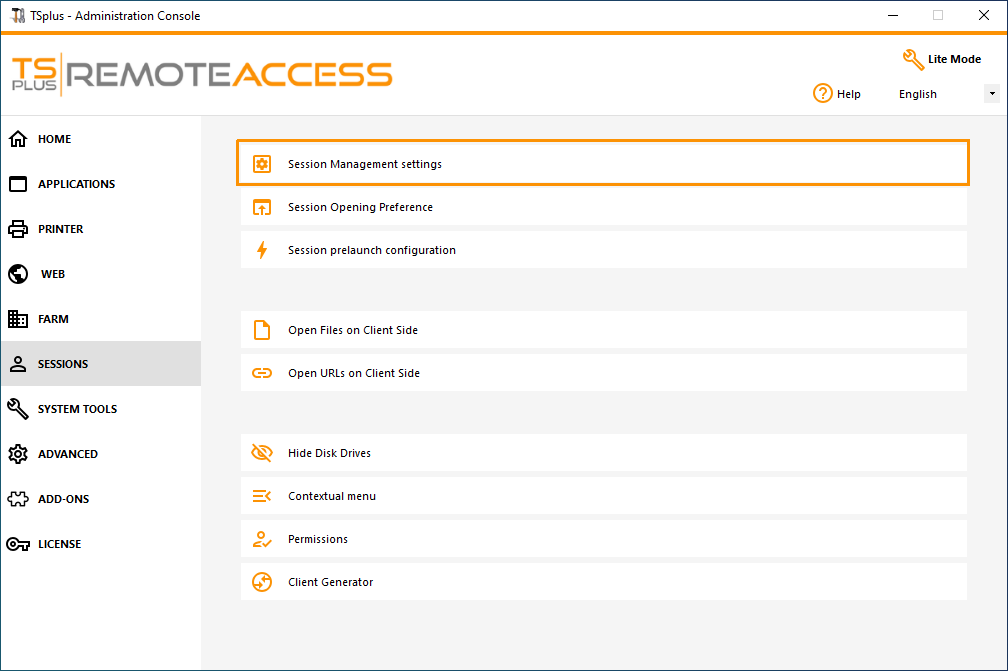
The session opening preference allows you to choose your shell session preference, your logon preferences, the background color of your sessions, add your own logo and rename it to your liking.
![]()
By default, on these logon preferences are enabled:
- The “Display progress bar during logon”.
- “Enable Time Zone Redirection” which enables the client computer to redirect its time zone settings to the Remote Desktop Services session. If you enable this policy setting, clients that are capable of time zone redirection send their time zone information to the server.
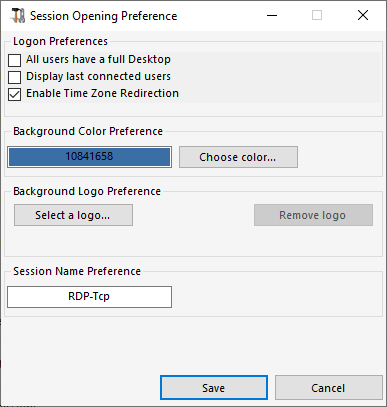
You can also set a full Desktop for all your users and get a display the last connected users by ticking the corresponding boxes. You can customize your users sessions by adding a new Background Color, another logo or none and use the session name of your choice.
- Since TSplus 11.70 release, you can use TSplus WinXshell as an alternative to the Windows shell.
Following the October 10 Windows Update, administrators allowing their users to start a Remote Desktop saw the Windows shell as an issue.
The main problem resides in the session opening/black screen issue when a complete desktop is assigned to multiple users on Windows 10 and Server 2016.
It provides features and graphical experience similar to Windows 2016 Windows shell, such as the display of the 2016 Start button and taskbar.
It is especially useful if you use Windows 10 or Windows 16 Operating systems, manage 10 users or more and wish to assign them a full desktop.
Backup Parameters
You can backup or restore your server parameters by clicking on the tile of the same name, on the Advanced tab:
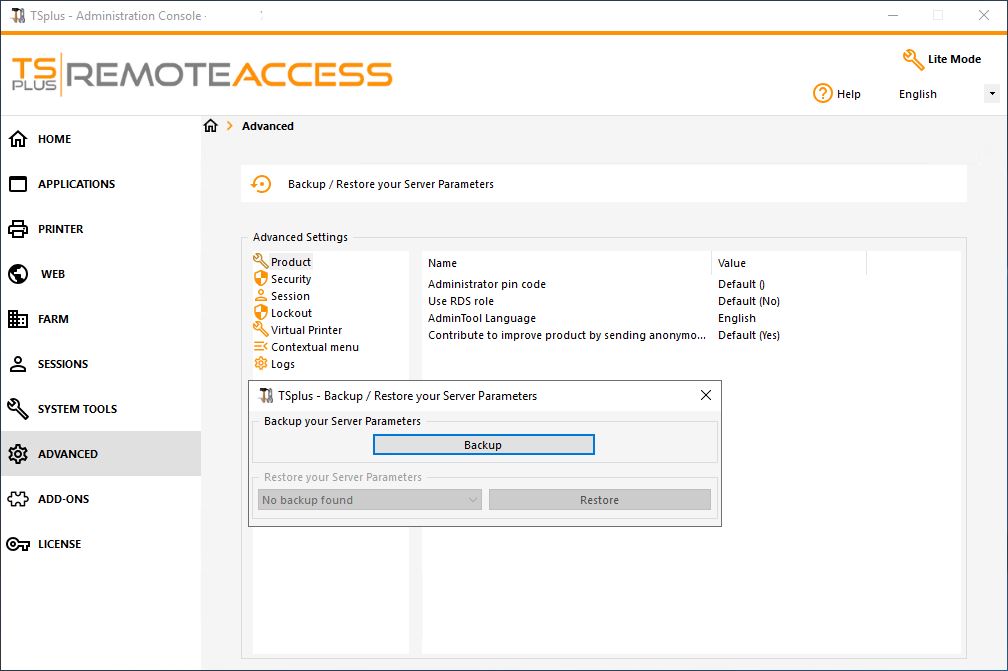
Click on the Backup button to make a backup, which will be dated and added to the list of your restore points:
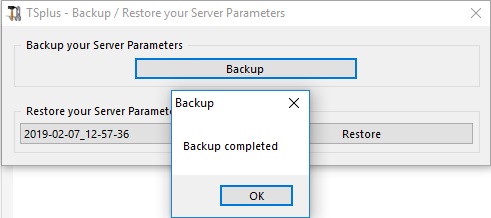
The backup file can be found on the C:\Backupparam folder:
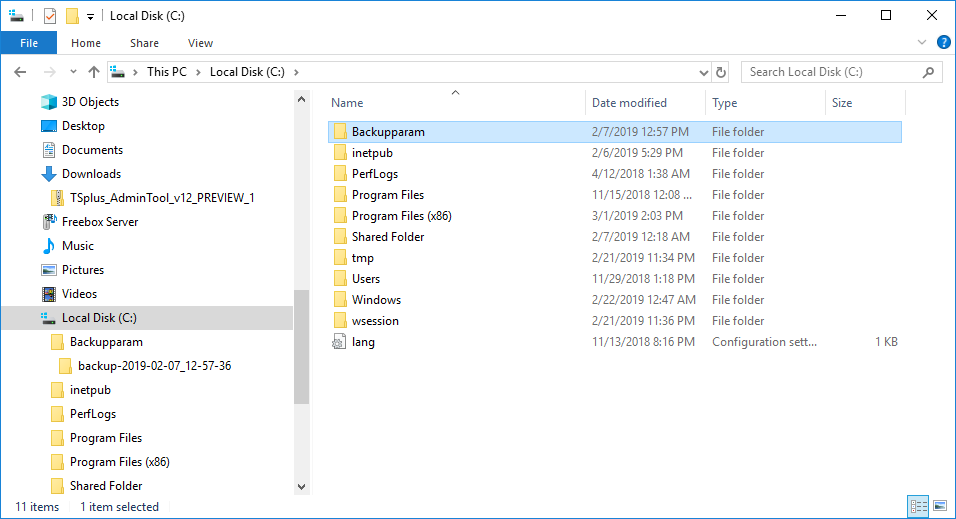
Copy the folder to the new server after installing TSplus Remote Access and restore the backup.
You can then check with the trial for 15 days that the functioning of the accounts and access is correct before migrating your license definitively.
More information on this documentation.
Reboot your serverThe “Reboot the server tab” allows you to reboot your server.
![]()