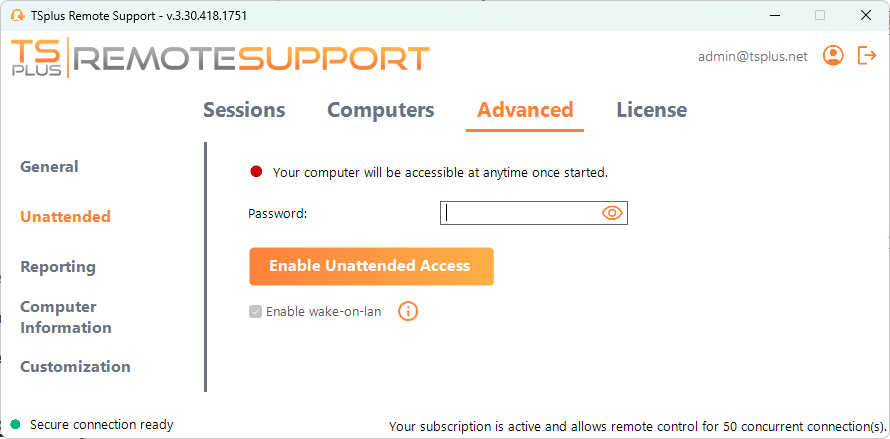
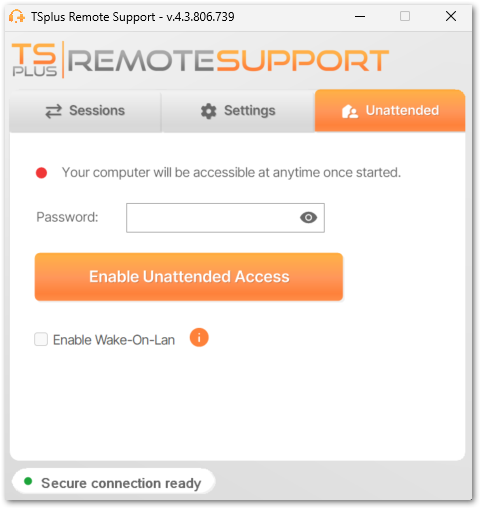
Enable Unattended Access
End-users can configure remote computers to be accessible at any time and without needing to be in front of it.
To keep unattended acces to their PC secure, end-users must:
- Choose an Unattended Access password (the main password in the Session tab will still be valid to allow temporary access)
- Click on the Enable Unttended Access button
Full version
Lite version
End users then share their Remote Support ID and unattended access password with support agents.
End users can disable unattended access or change the password at any time.
Important: enabling unattended access requires admin privileges.
Must-Know Basics
Remote Support identifies a computer with a 9-digit number. For example: 123 456 789
Unattended access to a computer is only possible using this 9-digit number (without the suffix!).
On Windows OS specifically, since multiple users can be using the same computer at the same time via RDP sessions, an additional number is added as a suffix to identify each session. For example: 123 456 789 - 12 This identify the Windows RDP session #12 running on computer identified with Remote Support ID 123 456 789 This way each RDP session is uniquely identified and can be accessed specifying the proper identifier.
The console session, which is unique on every Windows Computer is identified without a suffix, so 123 456 789 for example.
This means that when connecting to a Windows computer using the 9-digit number identifier, you either:
- want to connect to an already started Remote Support client running in the Console session of the remote computer,
- want to connect using the configured unattended access (so the unattended access password) of the remote computer.
Command line usage
Unattended access can also be configured directly using command line in an admin command prompt.
The arguments to use are the following (arguments must be separated by a space):
-
/enable-unattended
-
/unattended-password [the-computer-unattended-password]
The unattended password is optional if it has already been configured. -
/computer-name [the-computer-name-entry-to-be-created]
-
/owner-email [the-computer-entry-owner-email]
-
/folder-name [the-folder-name-in-which-the-computer-entry-will-be]
The folder must exist and be available to the owner specified.
If multiple folder have the same name, the first folder found will be used
A complete example: to enable unattended access with password “myoverlynotcomplicatedbutlongpasswordsothatnoonefindit” for the current computer and associate it to the user “[email protected]”, which will create a new computer entry named “John computer” in the folder “Unattended computers” you may use:
RemoteSupport.exe /enable-unattended /unattended-password "myoverlynotcomplicatedbutlongpasswordsothatnoonefindit" /computer-name "John computer" /owner-email "[email protected]" /folder-name "MyCompany computers"