Certificates and Certification process
1. Certification Process
The certificates are delivered by the Certificates Authorities (CA). This is a 3-step process.
a) The generation of a Key Pair or Private Key in standard RSA 2048 bits. This key will be used to generate a CA Request based on it.
b) The CA Request generated is transmitted to the CA. It contains all the necessary information in order for the provider to deliver a certificate (Country Name 2 letters code, State or Province Full Name, Locality Name, Organization Name e.g. Company, Organization Unit Name e.g. Section, valid email address and Common Name (CN) e.g. MyDomainName.com).
c) The Certificate authority verifies the information you transmitted and returns the certificate, and eventually also intermediate certificates that are required to access your certificate. The certificate also contains the CA Reply (the validated Private Key). Once you have the certificate, the CA reply, its key pair (private key), and the intermediates certificates, they must be imported in the key store handled by Terminal Service Plus.
2. The Certificates
The delivery usually contains several files. Each file is a certificate. As said previously, the authority delivers the certificate of your Domain name and intermediate Certificates that are mandatory to access to your certificate.
The common format file is .cer or .crt. These extensions are recognized by the OS which associates the certificate Icon.
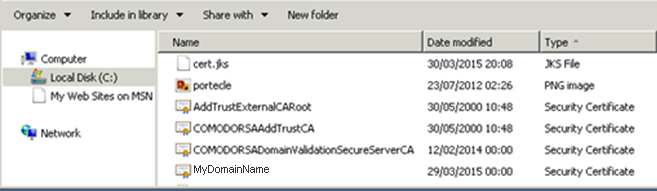 In our example above, we received 4 files (.crt). The first, second and third are intermediate certificates (CARoot, TrustCA, DomainValidationCA).
The fourth is our Certificate which certifies our domain name MyDomainName.crt. They all have to be installed together.
In our example above, we received 4 files (.crt). The first, second and third are intermediate certificates (CARoot, TrustCA, DomainValidationCA).
The fourth is our Certificate which certifies our domain name MyDomainName.crt. They all have to be installed together.
For a better understanding of how to proceed, let’s examine the certificates.
3. Certificates Properties
The properties of the certificate CA Root show its path. Each certificate has a path from the root to the certificate of your domain name.
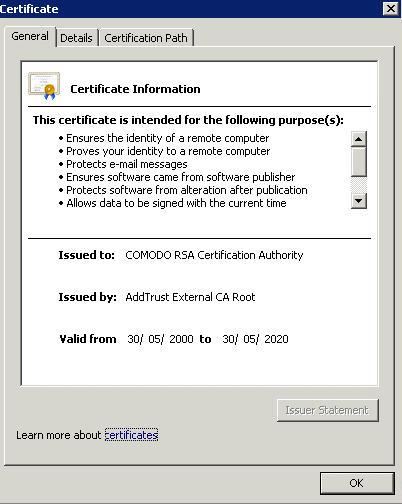
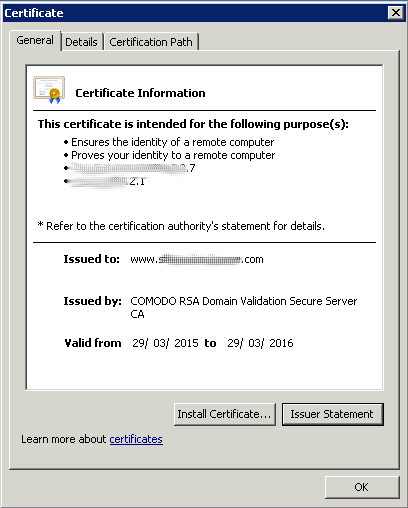
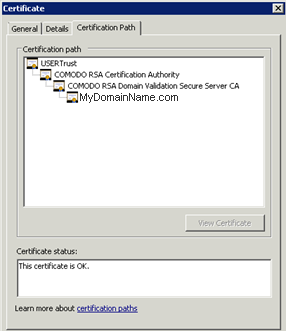 The properties of our certificate show all the general informations about the certificate (purposes, addresses, issued to CN), issued by and validity.
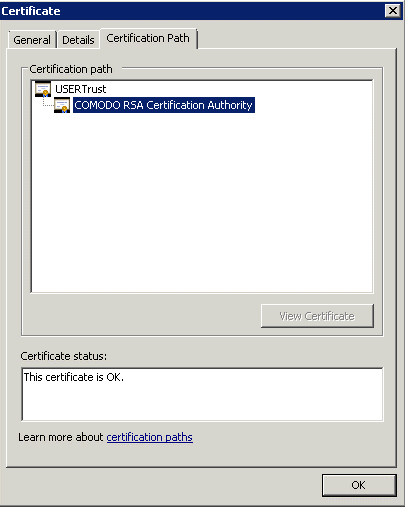
What is important to notice is the certification path. It includes the entire path needed to access our certificate.
It displays all the intermediate certificates that are included inside ours.
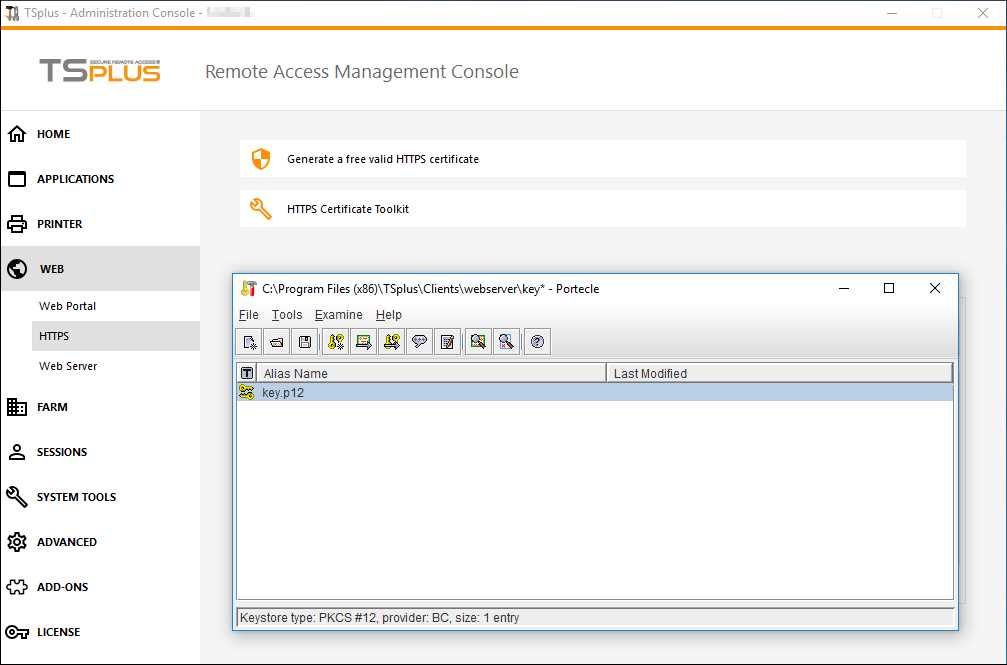
This is a simple process. You must import this entire certification path, plus the Key Pair in the Terminal Service Plus Key store file.
Use Windows certificate manager to import keypair and all certificates into Windows keystore as described in Certificates and Certification process (make keypair exportable when importing!) and then export that key back from Windows keystore by checking the option “Include all certificates in the certification path if possible”. For the format choose per example *.p12 Now create a new keystore in JKS format on Portecle, and go to Tools>Import Key Pair and import that *.p12 file:
 ### 4. Important notice about the Key Pair (Private Key)
The key Pair is the RSA 2048 Bit key generated for the CA Request of the certificate. It has been generated either in the Portecle add-on we provide, or with another available generator like openssl, IIS, online sites, or CA provider’s applications.
You must keep this Private Key. It is either a flat file text format unsecured .pem or a secured format .p12 or .pfx. The Private Key generated is mandatory to be able to generate the certificates correctly.