Generatore di Client Portatile
Panoramica
TSplus crea per impostazione predefinita un'icona per il Generatore di Client Portatile:
![]() Può essere accessibile anche nella scheda del Server dell'AdminTool:
Può essere accessibile anche nella scheda del Server dell'AdminTool:
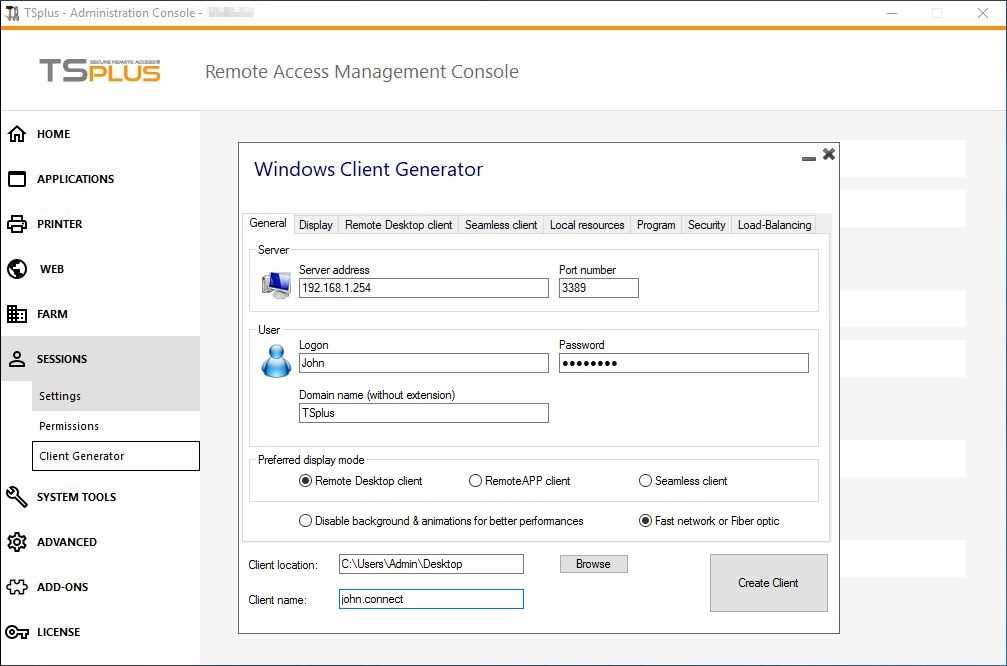
Consente di creare 3 tipi di client di connessione che possono essere copiati sul Desktop degli utenti o su una chiavetta USB per un uso portatile.
Nota
I client di connessione non sono compatibili con i computer Mac.
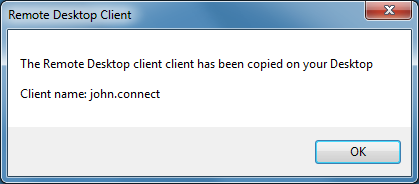
Dal rilascio di TSplus 11.40, il generatore di client è stato riprogettato per essere firmato numericamente e per evitare reazioni false/positive degli antivirus. Invece di un programma “.exe”, il nuovo Generatore di Client crea un file piatto crittografato con l'estensione “.connect”:
![]()
Sul lato client, ogni utente dovrà eseguire un programma firmato chiamato “Setup-ConnectionClient.exe” come prerequisito. Questo programma è disponibile sul tuo server, nella cartella del programma TSplus: TSplus\Clients\WindowsClient:
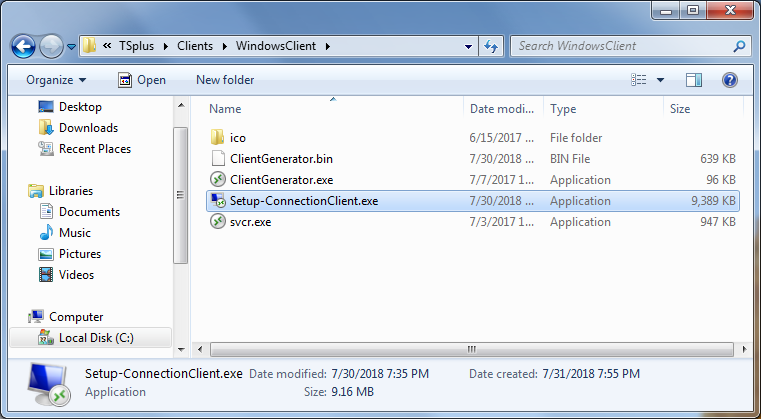
o nella cartella TSplus\Clients\www:
 o per
scaricandolo
.
Panoramica dettagliata
Clicca su un tabulatore per andare alle informazioni corrispondenti:
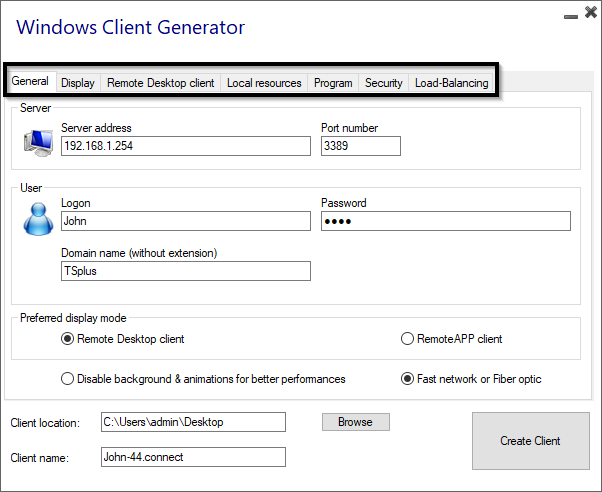
Finestra principale - Impostazioni generali
Quando avvii il generatore di client, la prima scheda visualizzata è la scheda generale. Qui troverai tutte le impostazioni di connessione essenziali di cui hai bisogno per iniziare.
-
Indirizzo del server: Inserisci l'indirizzo IP del server a cui desideri che il client si connetta.
-
Numero di porta: Inserisci il numero della porta del server. Il valore predefinito è 3389.
-
Nome utente e password: Se si inserisce un nome utente e una password, il programma client non chiederà all'utente di reinserirli ad ogni sessione. Per ripristinare il salvataggio di questo accesso/password, è necessario creare e modificare un collegamento del Client Desktop Remoto e aggiungere il -reset on cambia alla fine del campo di destinazione.
Credenziali
- Se non vuoi salvare le credenziali, inserisci "nosavecredential" nel campo di accesso del Generatore di Client Portatile.
- Se non vuoi visualizzare la finestra di accesso con il nome utente, la password e il nome del dominio, inserisci semplicemente "nopassword" nel campo della password.
- Se desideri abilitare l'autologon, inserisci *SSO nel campo nome utente, il programma client chiederà solo nome utente e password durante la prima connessione. Salverà queste informazioni sulla workstation dell'utente in modo che l'utente non debba più identificarsi.
- Se desideri che il nome dell'utente locale corrente venga visualizzato come accesso per la sessione, inserisci **, o %USERNAME% nel campo di accesso.
-
Nome di dominio: Inserisci un nome di dominio se presente.
-
Modalità di visualizzazione preferita: Puoi scegliere la tua modalità di visualizzazione preferita tra le seguenti opzioni:
-
Il Desktop Remoto Classico , visualizzando il tuo ambiente di sessione remota.
-
Il Client di connessione Microsoft RemoteApp per visualizzare le tue applicazioni remote come se fossero installate localmente. Ha una migliore prestazione grafica rispetto alle applicazioni minimizzate.
-
Il Client senza soluzione di continuità , che funziona allo stesso modo di RemoteApp, ma per versioni più vecchie di Windows come Windows XP e 2003.
-
Terminal Service Plus Seamless vs Microsoft RemoteApp
Microsoft RemoteApp è una funzionalità di Microsoft che richiede Windows 7 Enterprise o Ultimate e versioni superiori.
Tutti i PC degli utenti devono avere almeno un client RDP6. A differenza del client Seamless, il client di connessione RemoteApp non dipende dalle impostazioni del colore di trasparenza. Puoi modificare le preferenze di visualizzazione e stampa del client RemoteApp nella scheda Web dell'Admintool. Le applicazioni minimizzate possono essere trovate direttamente nella barra delle applicazioni di Windows, come le applicazioni locali.
Terminal Service Plus Seamless fornisce un'esperienza utente simile ed è disponibile su qualsiasi sistema host Windows.
In base a un colore di trasparenza selezionato dall'Amministratore, il Microsoft Remote Desktop non viene più visualizzato e l'utente vedrà solo le sue applicazioni pubblicate.
Il colore senza soluzione di continuità può essere modificato e deve essere lo stesso quando si utilizza l'AdminTool e il Portable Client Generator.
Maggiori informazioni su questi tipi di client possono essere trovate qui .
-
Velocità di rete Puoi scegliere tra due opzioni a seconda della velocità della tua rete:
- Disabilita la visualizzazione dello sfondo e le animazioni grafiche per reti a bassa velocità.
- Abilita la visualizzazione in background e le animazioni grafiche per fibra ottica o rete veloce.
-
Posizione del cliente: Definisci la posizione del tuo client generato.
-
Nome del cliente: Puoi nominare il tuo cliente come desideri.
Visualizza
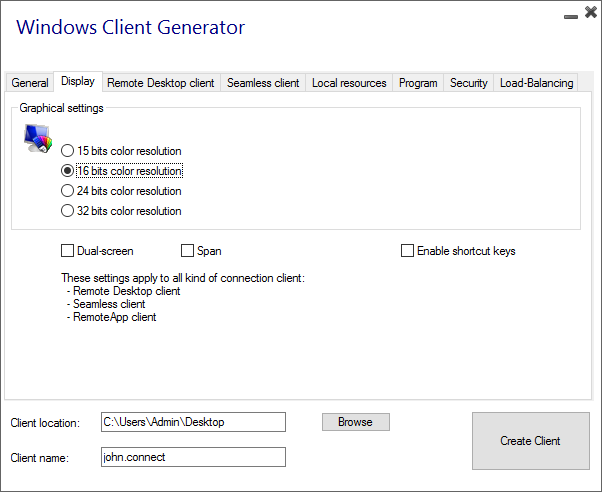
In questa scheda, puoi cambiare il colore e la risoluzione dello schermo della sessione. Puoi anche adattare la tua sessione per schermi doppi, con o senza estensione. L'opzione di estensione ti consente di allungare la tua sessione su entrambi gli schermi. Puoi consentire l'uso del tasto TAB nella sessione.
Caratteristiche del Client Desktop Remoto
In questa scheda, puoi scegliere quale risoluzione desideri abilitare per l'utente:
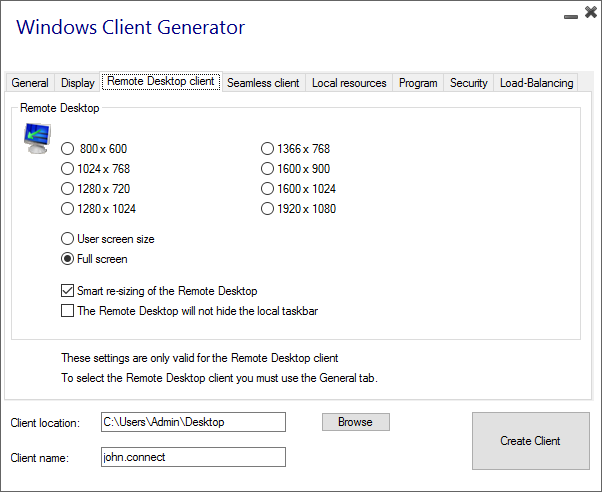
Puoi selezionare le caselle per abilitare il ridimensionamento intelligente del Remote Desktop e, se desideri che il Remote Desktop non nasconda o sovrapponga la barra delle applicazioni locale.
Risorse locali
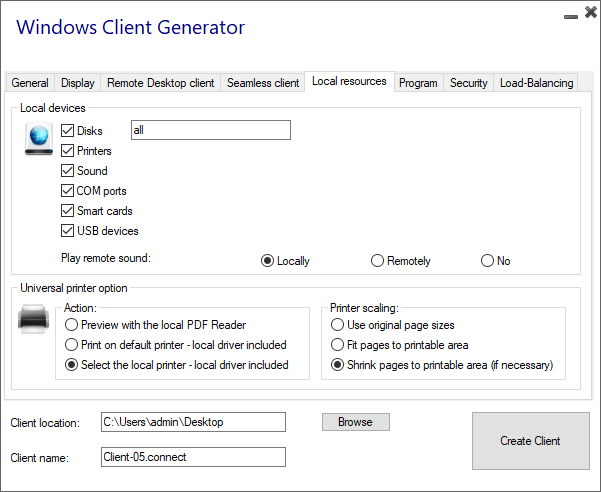 La scheda delle risorse locali raccoglie tutti i dispositivi che puoi reindirizzare nella tua sessione remota.
Il campo modificabile accanto al dischi La casella consente di specificare quali dischi sono disponibili nella sessione remota. Devi semplicemente separare ogni lettera del disco (C :, E: …) con una virgola. Quando la casella dei dischi è selezionata e non è specificato alcun disco, tutti i dischi sono inclusi nella sessione remota.
Stampanti corrispondono alle porte LPT e le porte COM corrispondono alle porte seriali. Dalla versione 11.50 di TSplus, questi dispositivi locali sono selezionati per impostazione predefinita.
Di seguito, puoi scegliere la tua opzione per la stampa, con la stampante universale:
- Anteprima lettore PDF locale: Il documento verrà visualizzato come un PDF e il lettore Acrobat locale aprirà il file. L'utente può stamparlo o salvare una copia sul proprio disco rigido locale.
- Stampa sulla stampante predefinita dell'utente: il documento verrà automaticamente inviato alla stampante predefinita dell'utente (il driver di stampa locale è incluso nel client di connessione TSplus).
- Seleziona una stampante locale: L'utente può selezionare una delle sue stampanti locali (il driver di stampa locale è incluso nel client di connessione TSplus).
Se non hai un lettore PDF installato sul tuo computer, ti consigliamo di utilizzare Foxit Reader. Vedi il nostro video tutorial su come stampare.
Programma
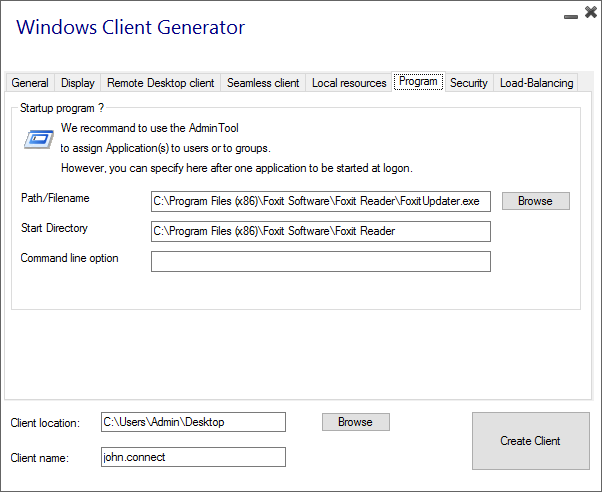 Puoi impostare un'applicazione di avvio tramite il Portable Client Generator e specificarne il percorso, la directory e i parametri, a partire dalla versione 11.30. Tuttavia, ti consigliamo di utilizzare l'AdminTool per assegnare le applicazioni desiderate.
Sicurezza
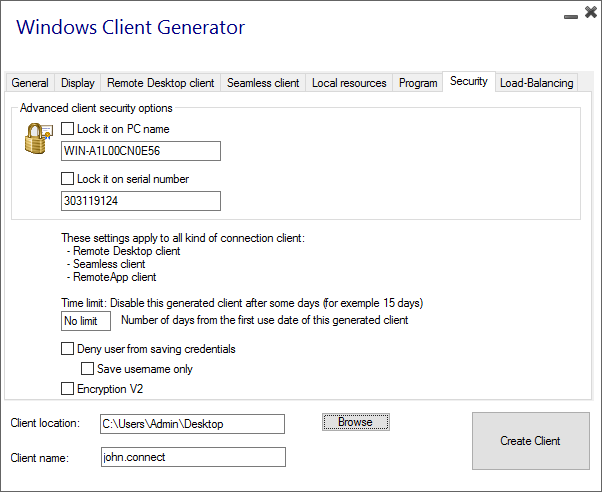
TSplus offre due ulteriori livelli di sicurezza fisica per mantenere sicure le connessioni dei tuoi utenti. La connessione può essere bloccata all'ID di una chiave USB, bloccata a un nome di computer, oppure puoi utilizzare entrambi i livelli di sicurezza simultaneamente.
- Se bloccato su una chiave USB l'utente può avviare una connessione da qualsiasi computer Windows idoneo inserendo la chiave USB e utilizzando il programma di connessione posizionato lì dall'amministratore.
- Se bloccato su un nome di computer , l'utente può connettersi con successo solo dal computer il cui nome è stato registrato con il server per la connessione del client portatile di quell'utente. Se entrambe le opzioni di sicurezza sono utilizzate, l'utente è limitato a connettersi dal proprio dispositivo specifico e solo se la corretta chiave USB preconfigurata è presente.
Per bloccare un client di connessione su una chiave USB, puoi farlo copiando il generatore di client situato in: C:\Program Files (x86)\TSplus\Clients\WindowsClient. Ora fai doppio clic sul generatore di client e seleziona la casella di blocco sul numero di serie situata nella scheda di sicurezza. Una volta fatto, puoi eliminare il generatore di client dalla chiave USB. Il client di connessione appena generato verrà posizionato sul desktop, non dimenticare di copiarlo di nuovo sulla chiave USB! Puoi eliminare il generatore di client che hai copiato sulla chiave USB in seguito.
-
Puoi definire il limite di tempo dalla data di primo utilizzo di un client generato inserendo il valore nella casella del limite di tempo. (che per impostazione predefinita è impostata su "nessun limite").
-
Le caselle sottostanti ti consentono di:
- Non visualizzare la possibilità di salvare le credenziali per un client generato.
- Salva solo il nome utente.
- Usa la crittografia V2.
Bilanciamento del carico
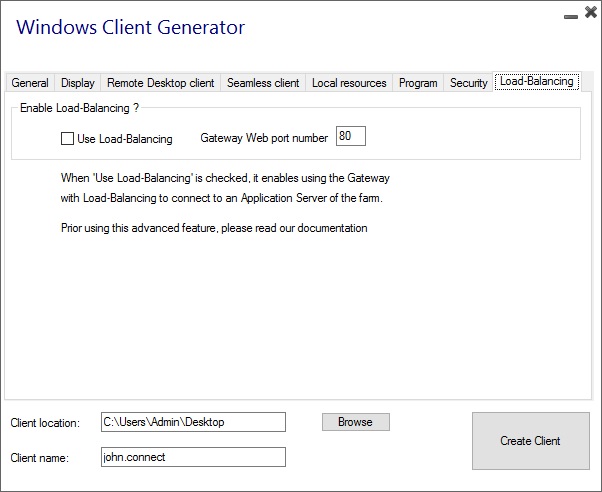
Puoi anche abilitare il bilanciamento del carico per connetterti a un server della tua farm. Non selezionare la casella "Utilizza il bilanciamento del carico" se non hai attivato la funzione di bilanciamento del carico sul tuo server. Dovrai inserire la porta Web del Gateway, che dovrebbe essere la stessa della porta web predefinita utilizzata su tutti i server della tua farm.
 ----------------------------------------------
 La personalizzazione del cliente è possibile. Vedi la documentazione corrispondente su
come modificare l'icona del cliente
e
modifica o elimina i suoi parametri
.