Opzione di stampa avanzata: Stampante Universale
La stampante universale TSplus consente di stampare documenti da qualsiasi PC o dispositivo mobile. Vedi il video tutorial da stampare con la Stampante Universale.
Gestore Universale della Stampa
Dalla versione 12 di TSplus, il Universal Printer Manager ha la sua scheda.
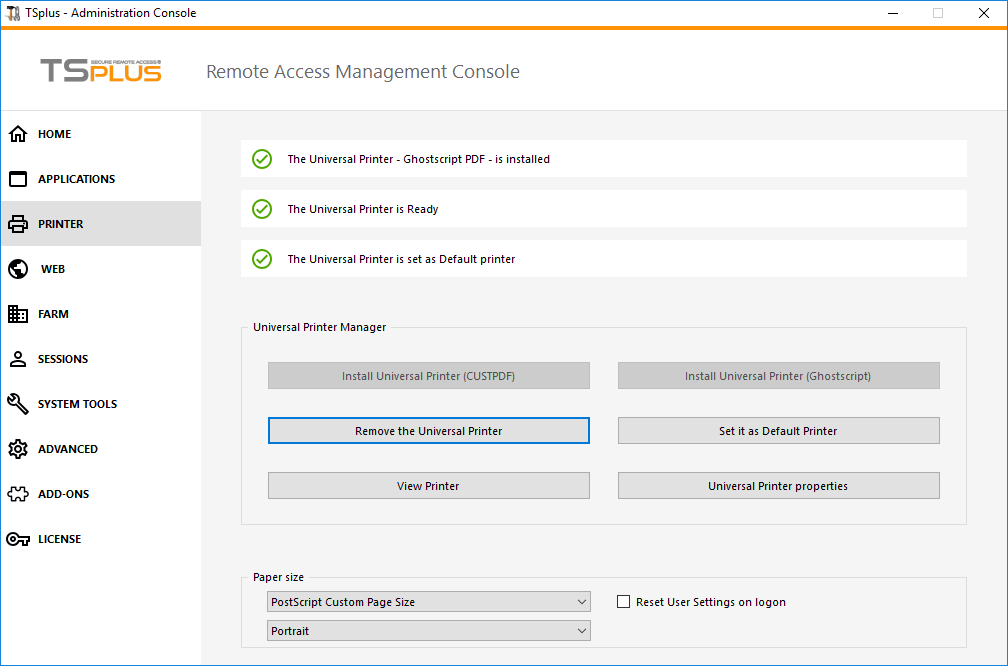 Il Gestore della Stampante Universale raccoglie tutti gli strumenti necessari per installare, disinstallare, visualizzare e gestire le opzioni della Stampante Universale. Questo strumento consente agli amministratori di assistere gli utenti con requisiti di stampa dinamici.
Le informazioni possono essere trovate in alto riguardo allo stato attuale della stampante universale: Puoi controllare se l'ultima versione, che utilizza GhostScript, è installata. Puoi vedere se la stampante è pronta. E puoi verificare che la stampante sia impostata come predefinita.
I pulsanti qui sotto ti permettono di:
- Installa la Stampante Universale (che utilizza CUSTPDF) , che è la vecchia stampante, prima della versione 9 di TSplus.
- Installa il Nuovo Stampante Universale (che utilizza Ghostscript) , che è più stabile con un maggiore supporto per i formati di stampa.
- Rimuovi la Stampante Universale .
- Imposta come stampante predefinita .
- Visualizza stampante: Apre una finestra in cui puoi vedere lo stato dei tuoi documenti di stampa, mettere in pausa, riprendere o annullare il lavoro di stampa. Puoi anche impostare le tue preferenze e proprietà di stampa.
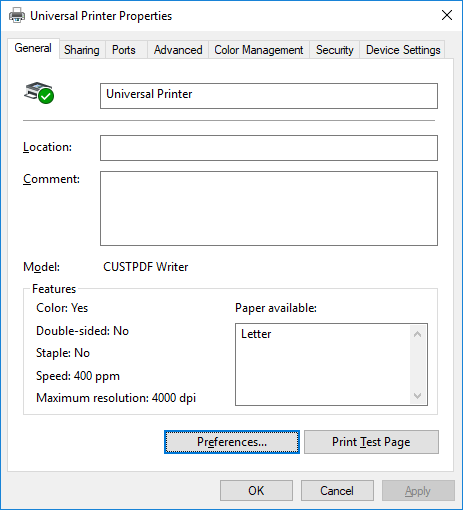
- Proprietà della stampante universale: Apre questa finestra, dove puoi vedere tutte le proprietà di stampa. Dopo la scheda Generale, ci sono schede per la condivisione, le porte, le impostazioni avanzate, la gestione del colore, la sicurezza e le impostazioni del dispositivo.
- Di seguito, puoi impostare la dimensione della carta per la stampa da A4 a qualsiasi formato di stampa. Vedi Personalizza il formato di stampa della pagina per la dimensione personalizzata della pagina PostScript).
- Puoi anche scegliere tra 2 formati di stampa: Verticale e Orizzontale .

Il “Resetta le impostazioni utente al login” box consente di forzare il formato predefinito della Stampante Universale a quello selezionato nell'AdminTool in ogni nuova sessione dell'utente. Se questa casella non è selezionata, durante la sua prima sessione, l'utente avrà il formato selezionato dall'AdminTool come formato predefinito, ma se sceglie un altro formato predefinito, allora sarà quello che verrà mantenuto per la sua prossima sessione.
###Stampa con la Stampante Universale
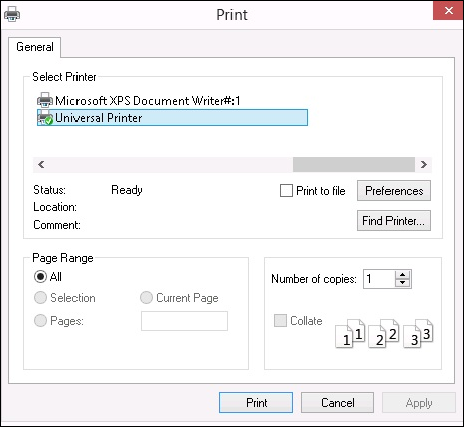
Quando si seleziona questa stampante, il documento da stampare viene automaticamente convertito in un file PDF:

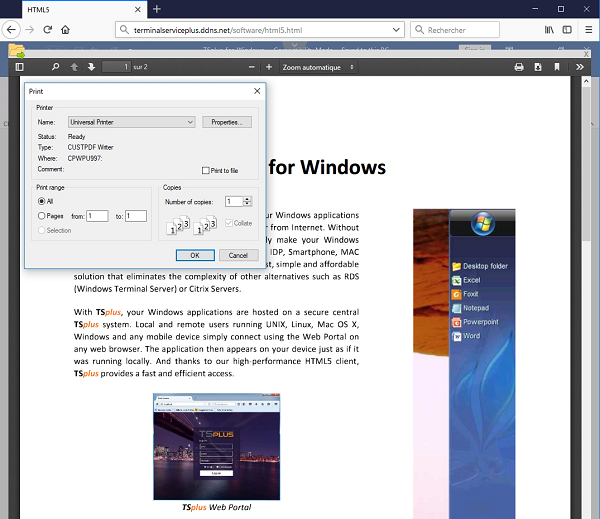
Questo file PDF viene automaticamente inviato al lettore PDF locale della workstation dell'utente. Ogni lavoro di stampa viene aperto non appena è pronto sul disco locale dell'utente, senza attendere la chiusura dell'anteprima di Acrobat precedente. Il processo di stampa inizia solo una volta che il PDF è completamente creato sul lato del client, il che garantisce l'avvio del lavoro di stampa senza ritardi.
Puoi scegliere tra 3 opzioni di stampa nella scheda Risorse locali di TSplus. Generatore di client portatile :
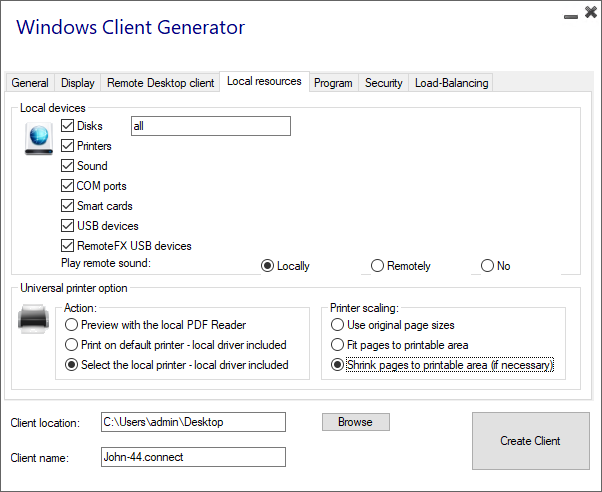
- Anteprima lettore PDF locale: il documento verrà inviato e l'Acrobat Reader locale si aprirà con il file PDF generato. L'utente può stamparlo o salvare una copia sul proprio disco rigido locale.
- Stampa sulla stampante predefinita dell'utente: il documento verrà automaticamente inviato alla stampante predefinita dell'utente (il driver di stampa locale è incluso nel client di connessione TSplus). Valore chiave: Questa opzione deve essere utilizzata per le persone che hanno molto da stampare al giorno e utilizzano la stessa stampante per questo scopo.
- Seleziona una stampante locale: L'utente può selezionare una delle sue stampanti locali (il driver di stampa locale è incluso nel client di connessione TSplus).
Se non hai un lettore PDF installato sul tuo computer, ti consigliamo di utilizzare Foxit Reader.
- Se desideri stampa sulla stampante locale predefinita con il lettore PDF definito dal sistema invece di Sumatra, puoi attivare l'impostazione "defaultsystem" nei parametri del client generati, come spiegato su questa documentazione .
###Personalizza il formato di stampa della pagina
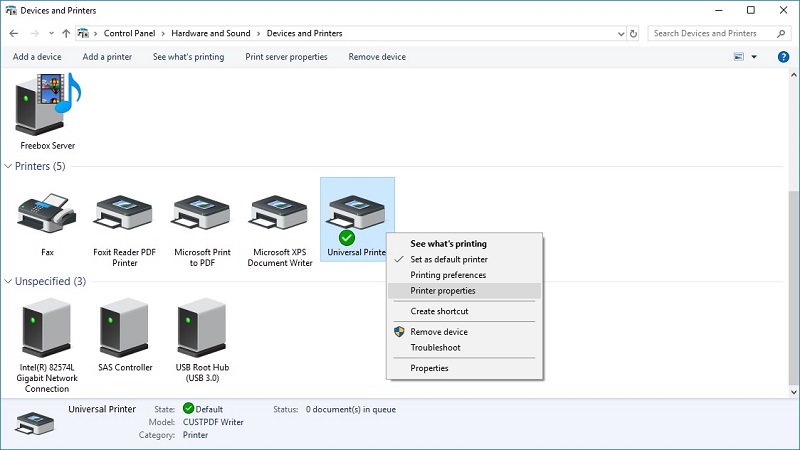
Se desideri avere un formato di pagina specifico e la tua stampante non è compatibile con la reindirizzazione della stampante, puoi impostare il formato di pagina della Stampante Universale aprendo il menu Dispositivi e Stampanti del Pannello di Controllo. Fai clic destro sulla Stampante Universale, quindi su Proprietà della Stampante:

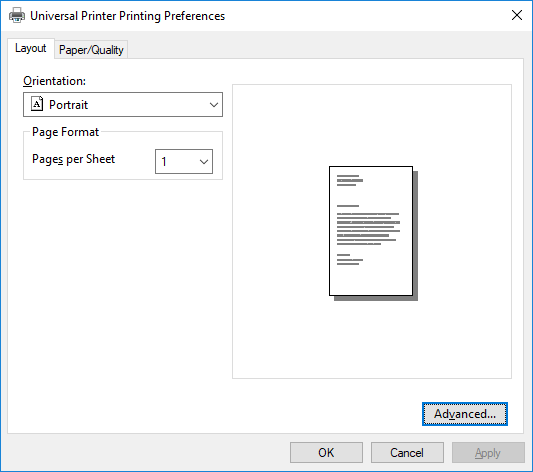
Clicca su Preferenze, poi su Avanzate:
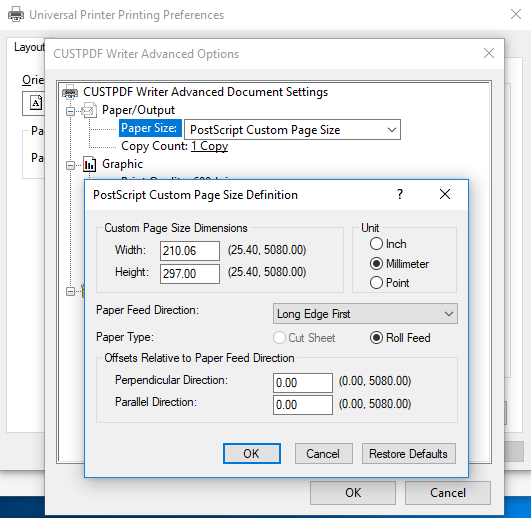
Vai su Impostazioni avanzate del documento Ghostscript PDF / Uscita carta / Dimensione carta / Pagina personalizzata PostScript. Infine, fai clic su Modifica dimensione pagina personalizzata e inserisci le tue impostazioni preferite. Questo è particolarmente utile con stampanti per ricevute e etichette.
L'impostazione di scaling predefinita della pagina di Sumatra (nessuna scala/riduci/fit) può ora essere impostata nel Client Generator e nel file remoteapp2.js per la connessione remoteApp dal Portale Web.
Puoi specificare dal generatore Client quale ridimensionamento della pagina desideri sia selezionato per impostazione predefinita (Nessuno/Adatta/Riduci), quando stampi utilizzando la stampante universale. Il valore predefinito di questa impostazione è "Usa le dimensioni originali delle pagine".
Puoi anche modificare questa impostazione per la connessione remoteApp utilizzando il portale web, cambiando il valore della variabile remoteapp2_pagescaling nel file “remoteapp2.js” situato in “C:\Program Files (x86)\TSplus\Clients\www\software”.
• Il valore 'noscale' è per "Usa le dimensioni originali della pagina" • Il valore 'shrink' è per "Riduci le pagine all'area stampabile (se necessario)" • Il valore 'fit' è per "Adatta le pagine all'area stampabile"
var remoteapp2_pagescaling = 'noscale';
 Nota: Se stai utilizzando queste impostazioni, assicurati di utilizzare, sul tuo workstation, la versione del Client di Connessione >= 14.30.0.71.