Activando HTTPS (SSL)
Follow the steps below in order to enable HTTPS (SSL) for the ServerGenius administration website and agents endpoint. As a result, administrators and machine agents will be able to access ServerGenius using the configured HTTPS port.
Please note that enabling SSL support for ServerGenius does not prevent administrators and machine agents from accessing ServerGenius using the current HTTP port configured (default is 7777 for administration website). Therefore, no hay necesidad de reconfigurar las máquinas ya monitoreadas por ServerGenius!
Résumé
- Requisitos
- Open Certificate Manager
- Importar certificados
- Find the certificate thumbprint
- Register SSL certificate for ServerGenius
- Configure ServerGenius SSL port
- Reiniciar ServerGenius
Requisitos
-
Please make sure you have administrator privileges on the server where ServerGenius is installed.
-
Enabling SSL support for ServerGenius requires a valid certificate, with the following details:
- El certificado Emitido a ou Nombre alternativo del sujeto should specify the ServerGenius website’s domain name (i.e. servergenius.mycompany.com) or the server name (i.e. COMP-SRVR01)
- El propósito del certificado debe ser Authentification du serveur
- El certificado debe contener el clave privada
-
If the certificate is not validated by a trusted certificate authority (CA) already installed in ServerGenius server, then the CA certificate is also required. Usually, the CA certificate is required when the certificate is a self generated certificate.
-
The password for the private key of the certificate and the CA certificate, if applicable, are required for the following steps.
Open Certificate Manager
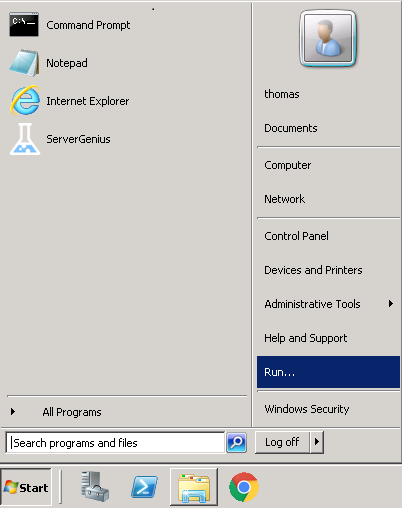
Log in as a local administrator on the server where ServerGenius is installed. Then, from the Windows task bar, click on Start Alors, cliquez sur Run… .
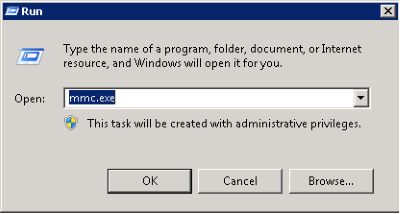
A window opens and prompts for a program executable name. Type mmc.exe y haga clic OK .
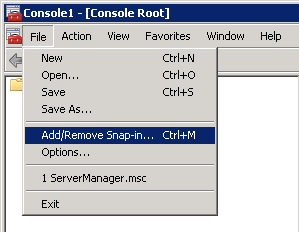
La Consola de Administración de Microsoft (MMC) se abre. Haga clic en Datei y luego haga clic en Agregar/Eliminar complemento choisir la fonctionnalité à gérer.
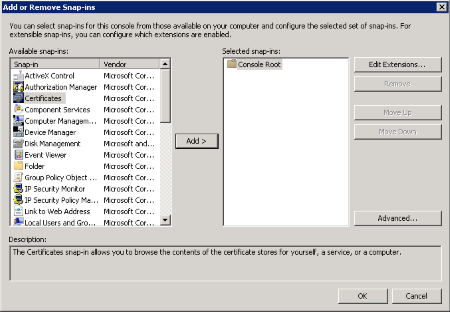
In der Liste der Snap-Ins wählen Sie aus Certificados y luego haga clic en Ajouter El complemento se agrega al Selected snaps-ins columna. Luego, haga clic OK .
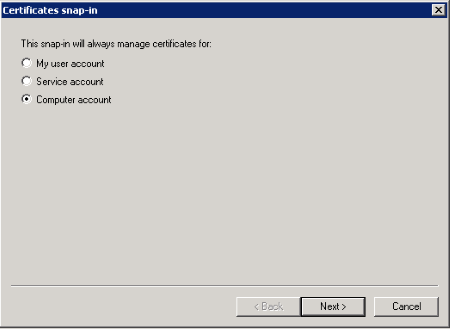
Dans la boîte de dialogue qui apparaît, sélectionnez Computer-Konto , luego haga clic Suivant .
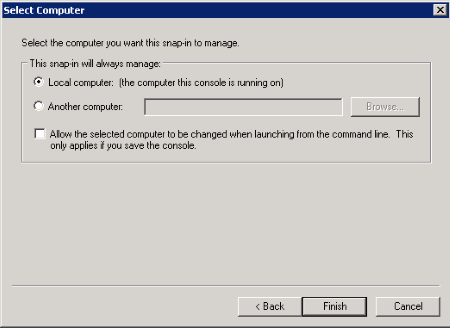
Elija Computer local y click Finish .
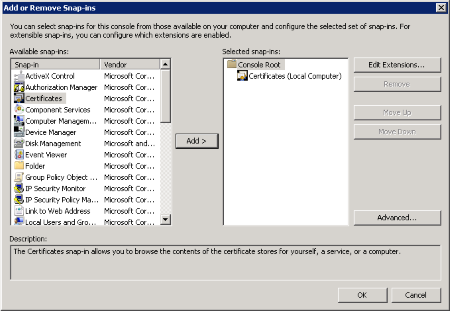
Clic OK to proceed with importing the certificates.
Importar certificados
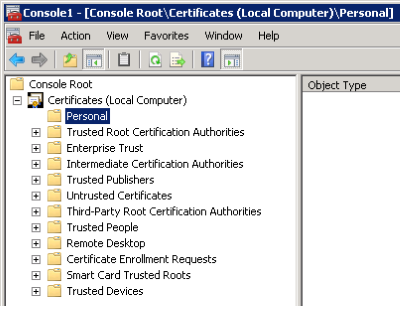
In the MMC window opened in the previous section, drill down to Certificates (Local Computer) y Personal .
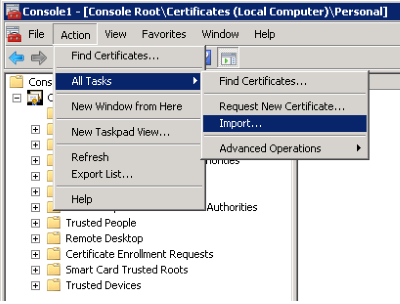
Desde el Acción menú en la barra de comandos, seleccione Todas las tareas y luego haga clic en Import… .
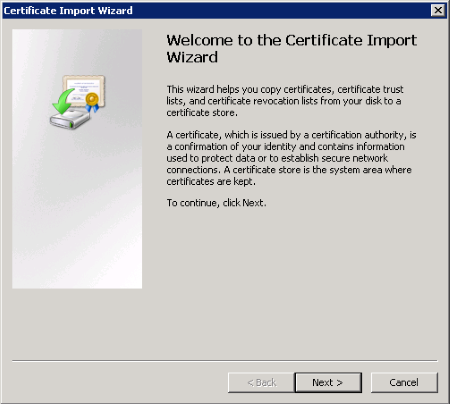
El asistente de importación de certificados se abre. Haga clic Suivant pour continuer.
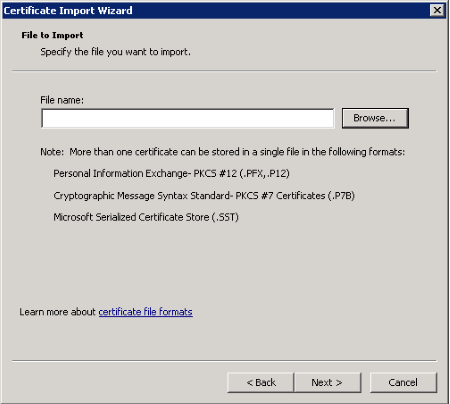
In this step, Click on Parcourir to find the certificate. Then, click Suivant to continue and import the selected certificate. On the next screen, enter the password you chose for the certificate.
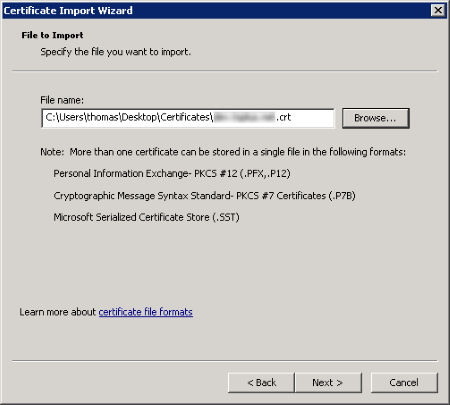
Clic Suivant pour continuer.
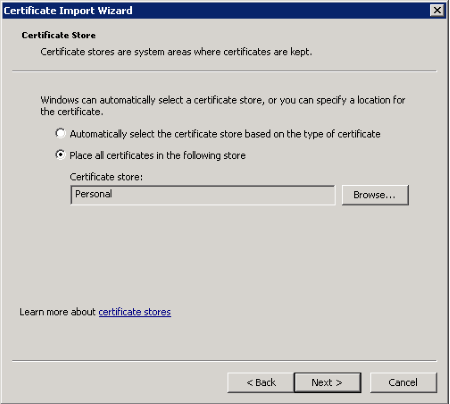
Elija Place all certificates in the following store Vérifiez que le magasin de certificats sélectionné est Personal , luego haga clic Suivant .

Clic Terminar to import the certificate.

Find the certificate thumbprint
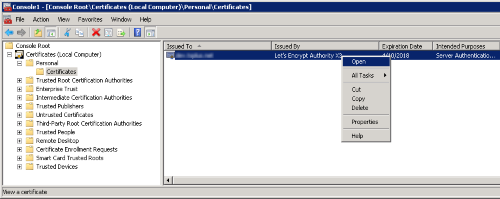
From MMC, right-click on the certificate and click Ouvrir .
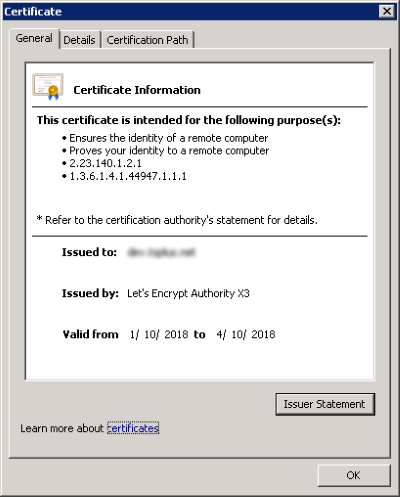
Die Einzelheiten des Zertifikats werden angezeigt. Klicken Sie auf Détails tab para mostrar las propiedades del certificado.
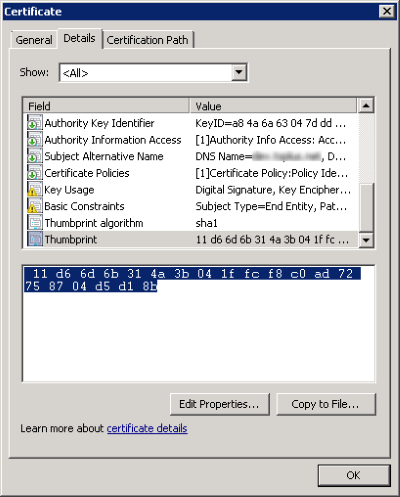
Copy the value of the Empreinte digitale property for the next steps.
Register SSL certificate for ServerGenius
From the administrative command line, type the following to set up the SSL binding to ServerGenius, and specify the appropriate port:
netsh http add sslcert ipport=0.0.0.0:7778 certhash=11d66d6b314a3b041ffcf8c0ad72758704d5d18b appid={35c57165-b326-49b5-9346-f4e2cf7f2353}

El comando anterior toma los siguientes parámetros:
-
ipport definiera IP-adressen och porten som bör konfigureras för ServerGenius. Som standard föreslår vi att använda port 7778.
-
certhash identifica el certificado por su huella digital, que se encuentra en la sección anterior.
-
appid specifies the application ID. ServerGenius application ID is 35c57165-b326-49b5-9346-f4e2cf7f2353.
Pour Windows XP et versions antérieures :
If your ServerGenius server is running under Windows XP or an earlier Windows release, the command netsh no estará disponible. use el httpcfg command instead as below:
httpcfg set ssl /i 0.0.0.0:7778 /h 11d66d6b314a3b041ffcf8c0ad72758704d5d18b /g "{35c57165-b326-49b5-9346-f4e2cf7f2353}"Configure ServerGenius SSL port
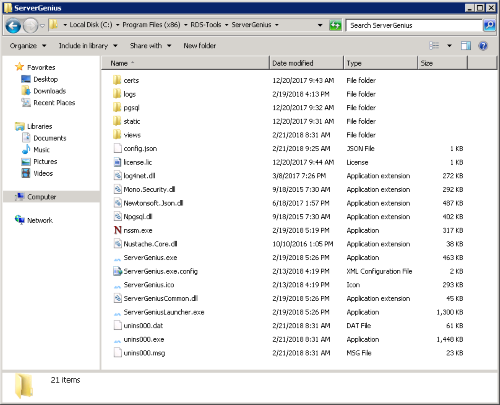
Open Windows Explorador de archivos and navigate to the ServerGenius setup directory. By default, the ServerGenius setup path is the following:
C:\Program Files (x86)\RDS-Tools\ServerGeniusThen, open the file config.json und geben Sie den SSL-Port (z. B. 7778) als Wert des SslPort propriété.
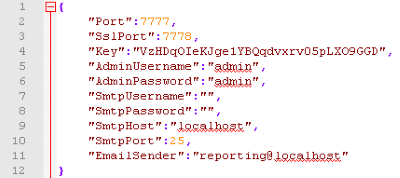
Nota: in order to disable SSL for ServerGenius, rollback the changes by setting the SslPort valor de la propiedad a 0 and then restart ServerGenius.
Reiniciar ServerGenius
From the administrative command line, type the following to restart ServerGenius service:
net stop ServerGenius && net start ServerGeniusServerGenius est maintenant configuré pour utiliser SSL (HTTPS).

